
Appearance
T
Toast POS
ActiveLeading cloud-based restaurant point of sale and management system. This integration enables seamless synchronization between Toast and POS Hub for menu management and order flow.
15-25 minutes
5 Regions
Medium
Overview
Toast is a leading cloud-based restaurant point of sale and management system. This integration provides seamless synchronization between your Toast POS and POS Hub, enabling automated menu sync, order injection, and comprehensive configuration options for payment types, dining options, and service charges.
Supported Regions
🇦🇺Australia
🇨🇦Canada
🇮🇪Ireland
🇬🇧United Kingdom
🇺🇸United States
Supported Features
Catalog Sync
CategoriesSynchronizes menu categories and organizational structure
Products & VariantsSyncs products, items, and their variants
Modifier GroupsSynchronizes modifier group structure
ModifiersSyncs individual modifiers and options
ImagesProduct and category image synchronization
Nutritional InfoNutritional information and calorie data
Dietary InfoDietary restrictions and allergen information
Order Integration
Order InjectionInject orders from POS Hub into POS system
Receive POS OrdersReceive orders created directly in POS
Configuration
Business HoursSynchronize standard operating hours
Collection/Delivery HoursSeparate hours for pickup and delivery services
Tax RatesTax rate configuration and synchronization
Special HoursHoliday and special event hours
Legend:✅ Supported|⚠️ Partial|❌ Not Supported|🔄 Coming Soon
Onboarding
Prerequisites
Before you begin, ensure you have:
Active Toast POS account with administrative access
Active POS Hub Location
Setup Guide
1
Install the Toast App in POS Hub
2-3 minBegin by installing the Toast integration from your POS Hub location
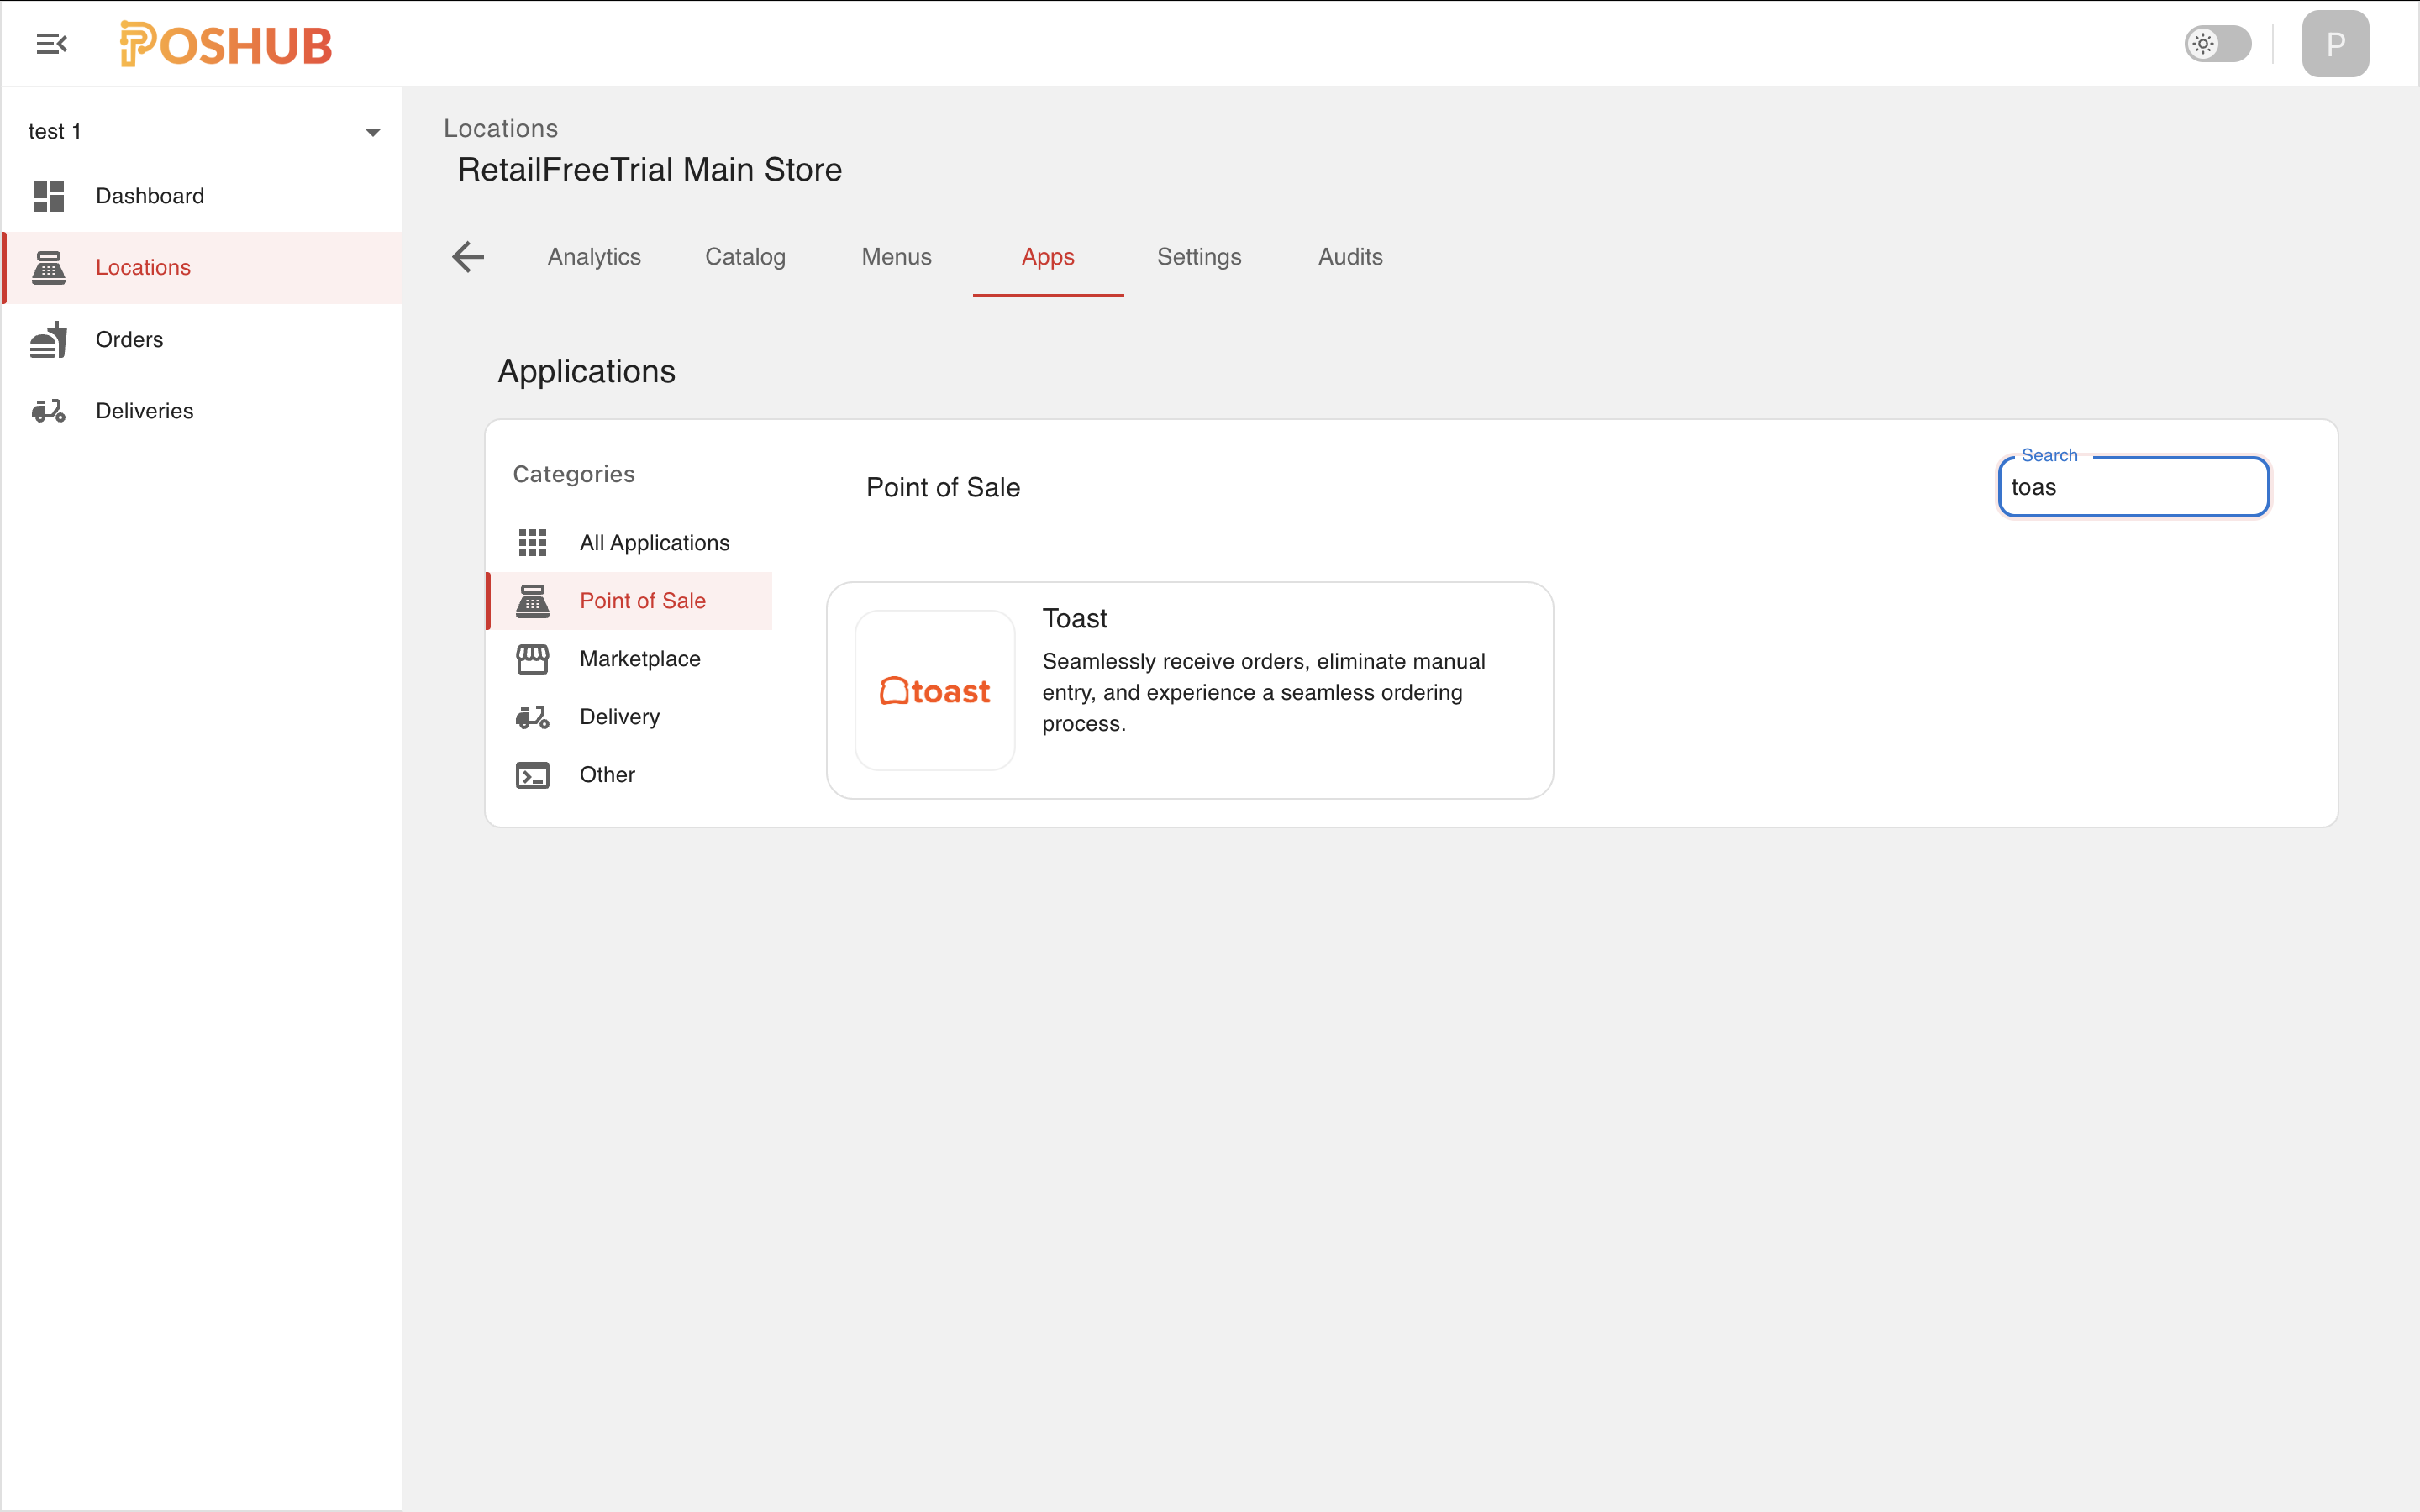
- From your POS Hub account, navigate to the Locations page
- Select the location where you want to install the Toast POS application
- Click on the Apps tab and select Point of Sale
- Locate the Toast application and click Install
2
Copy Group ID & Location ID
1-2 minCollect the identifiers shown in Toast App
- After installation, the application page will display a Group ID and Location ID
- Keep this page open, as you will need to copy these values in the next step
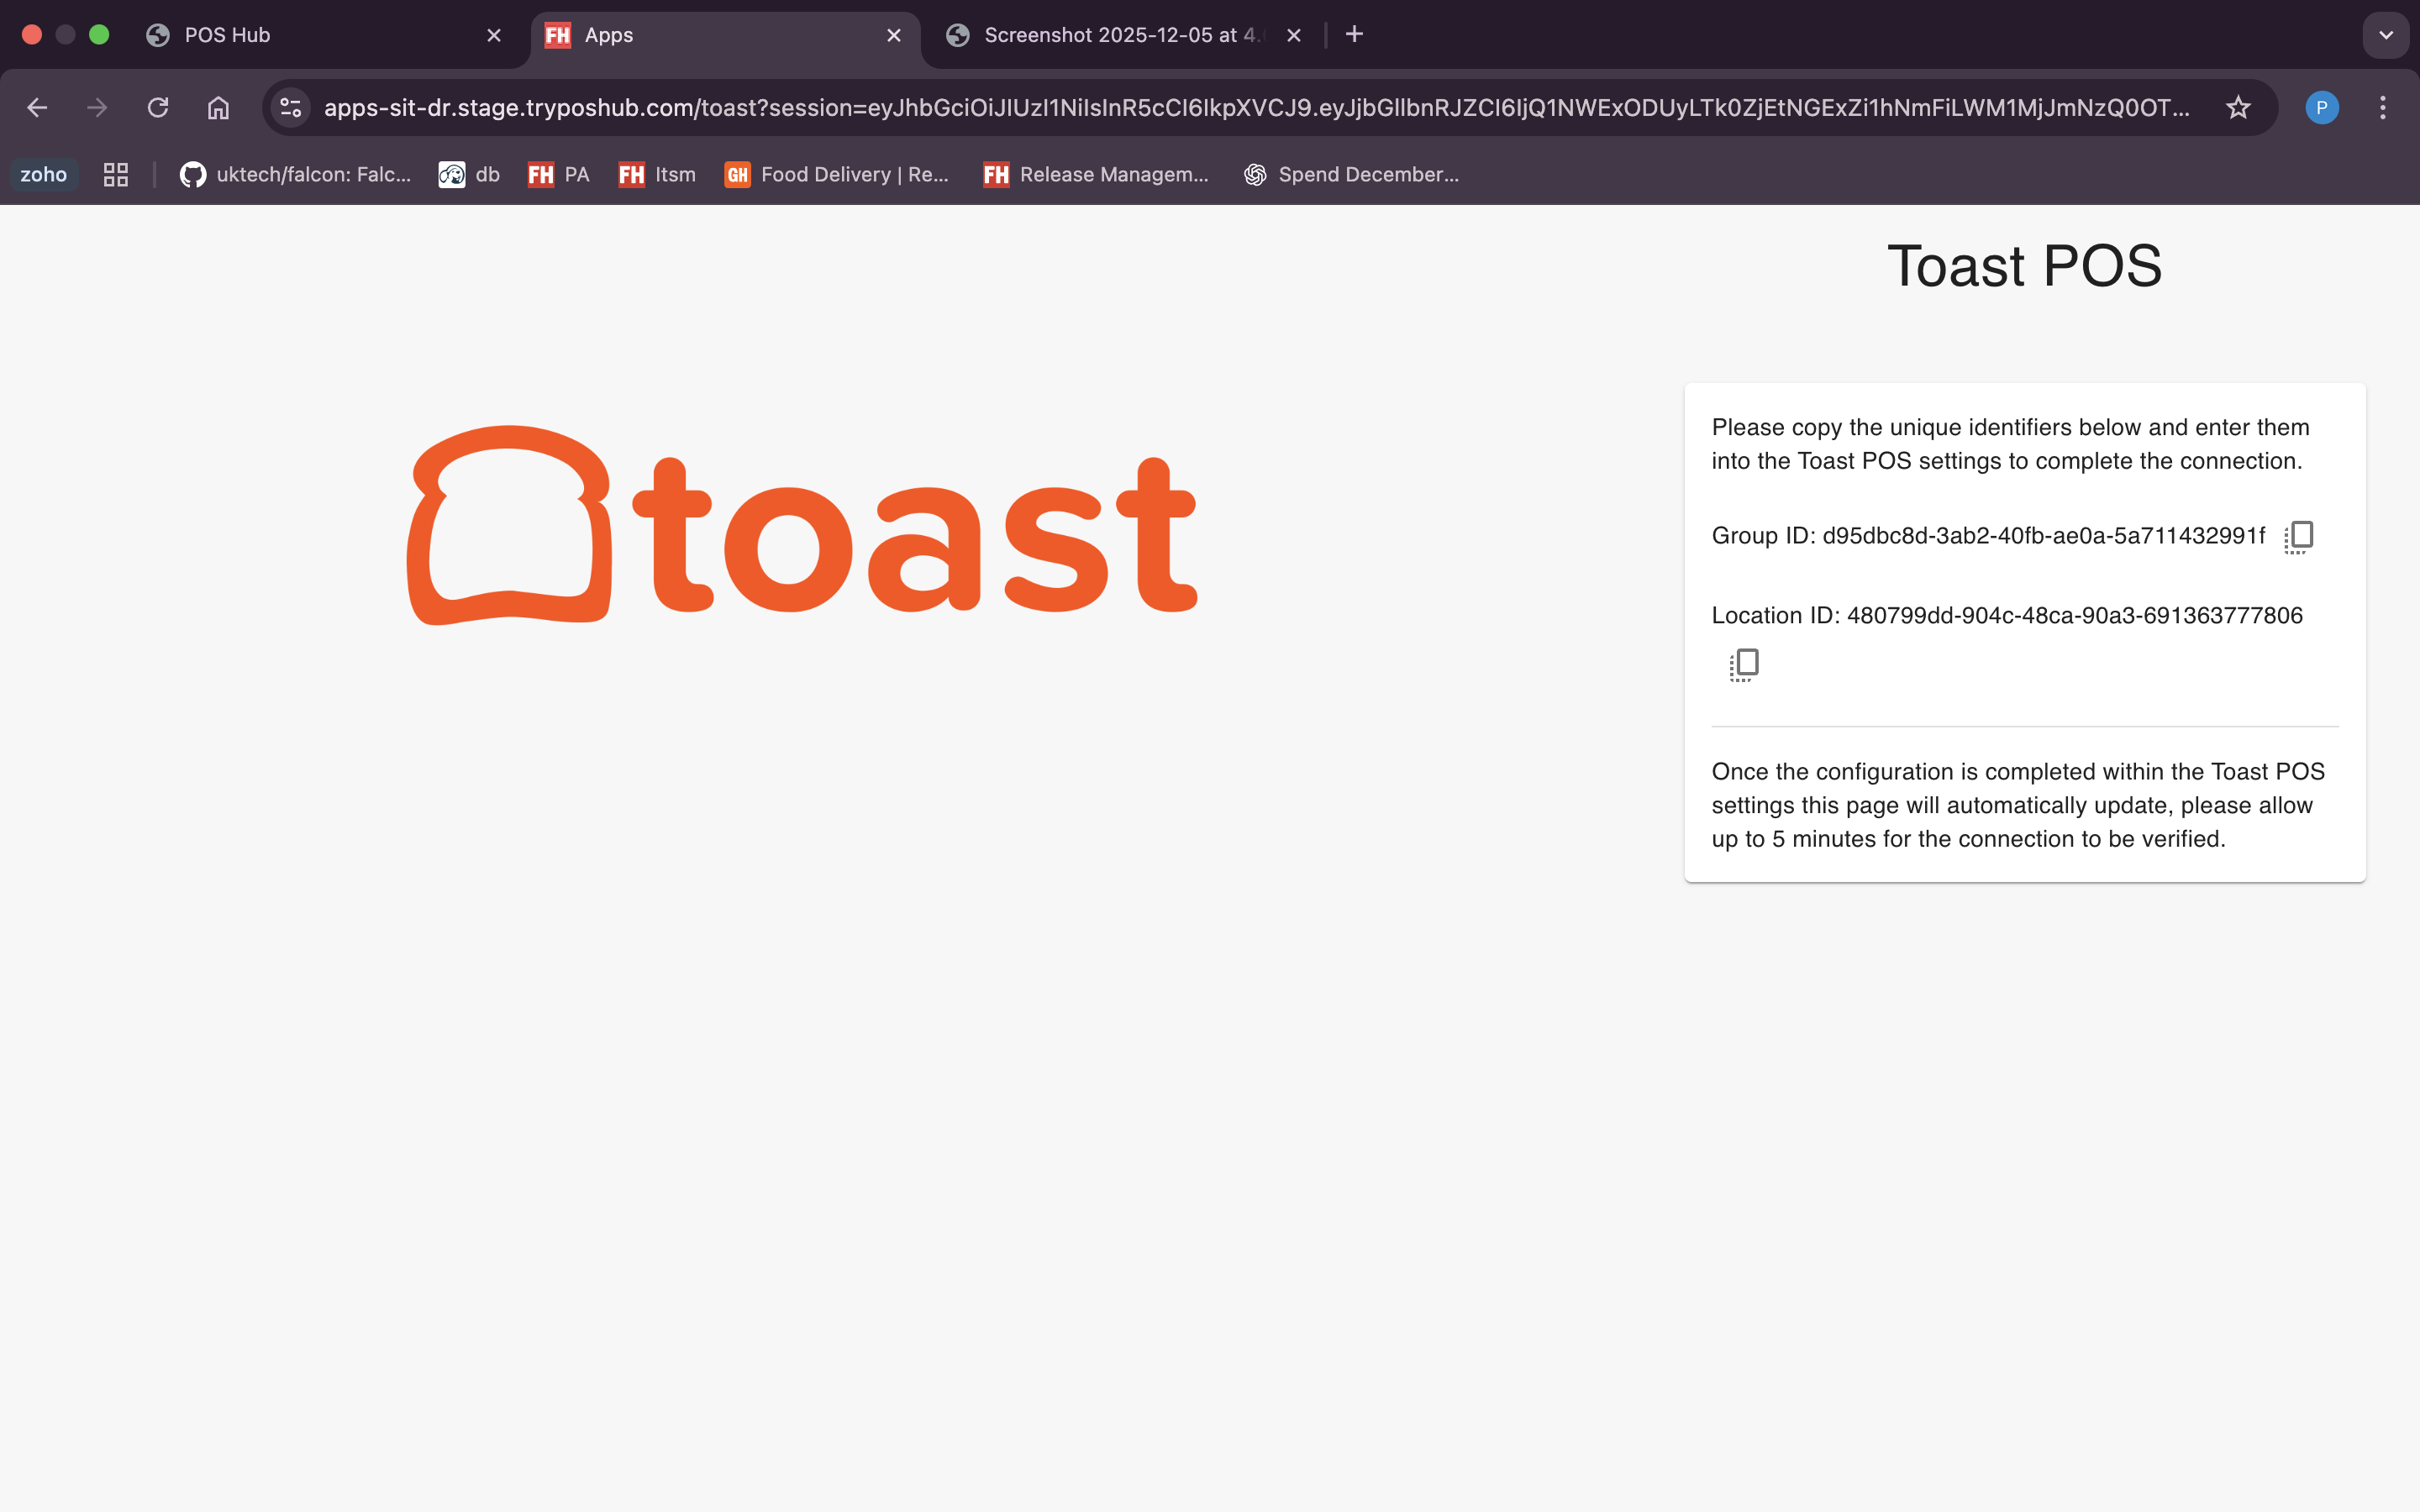
Keep the Group ID and Location ID handy for the next step
3
Enable POS Hub Integration in Toast
2-3 minActivate the integration from your Toast back-office
- Log in to your Toast POS back-office
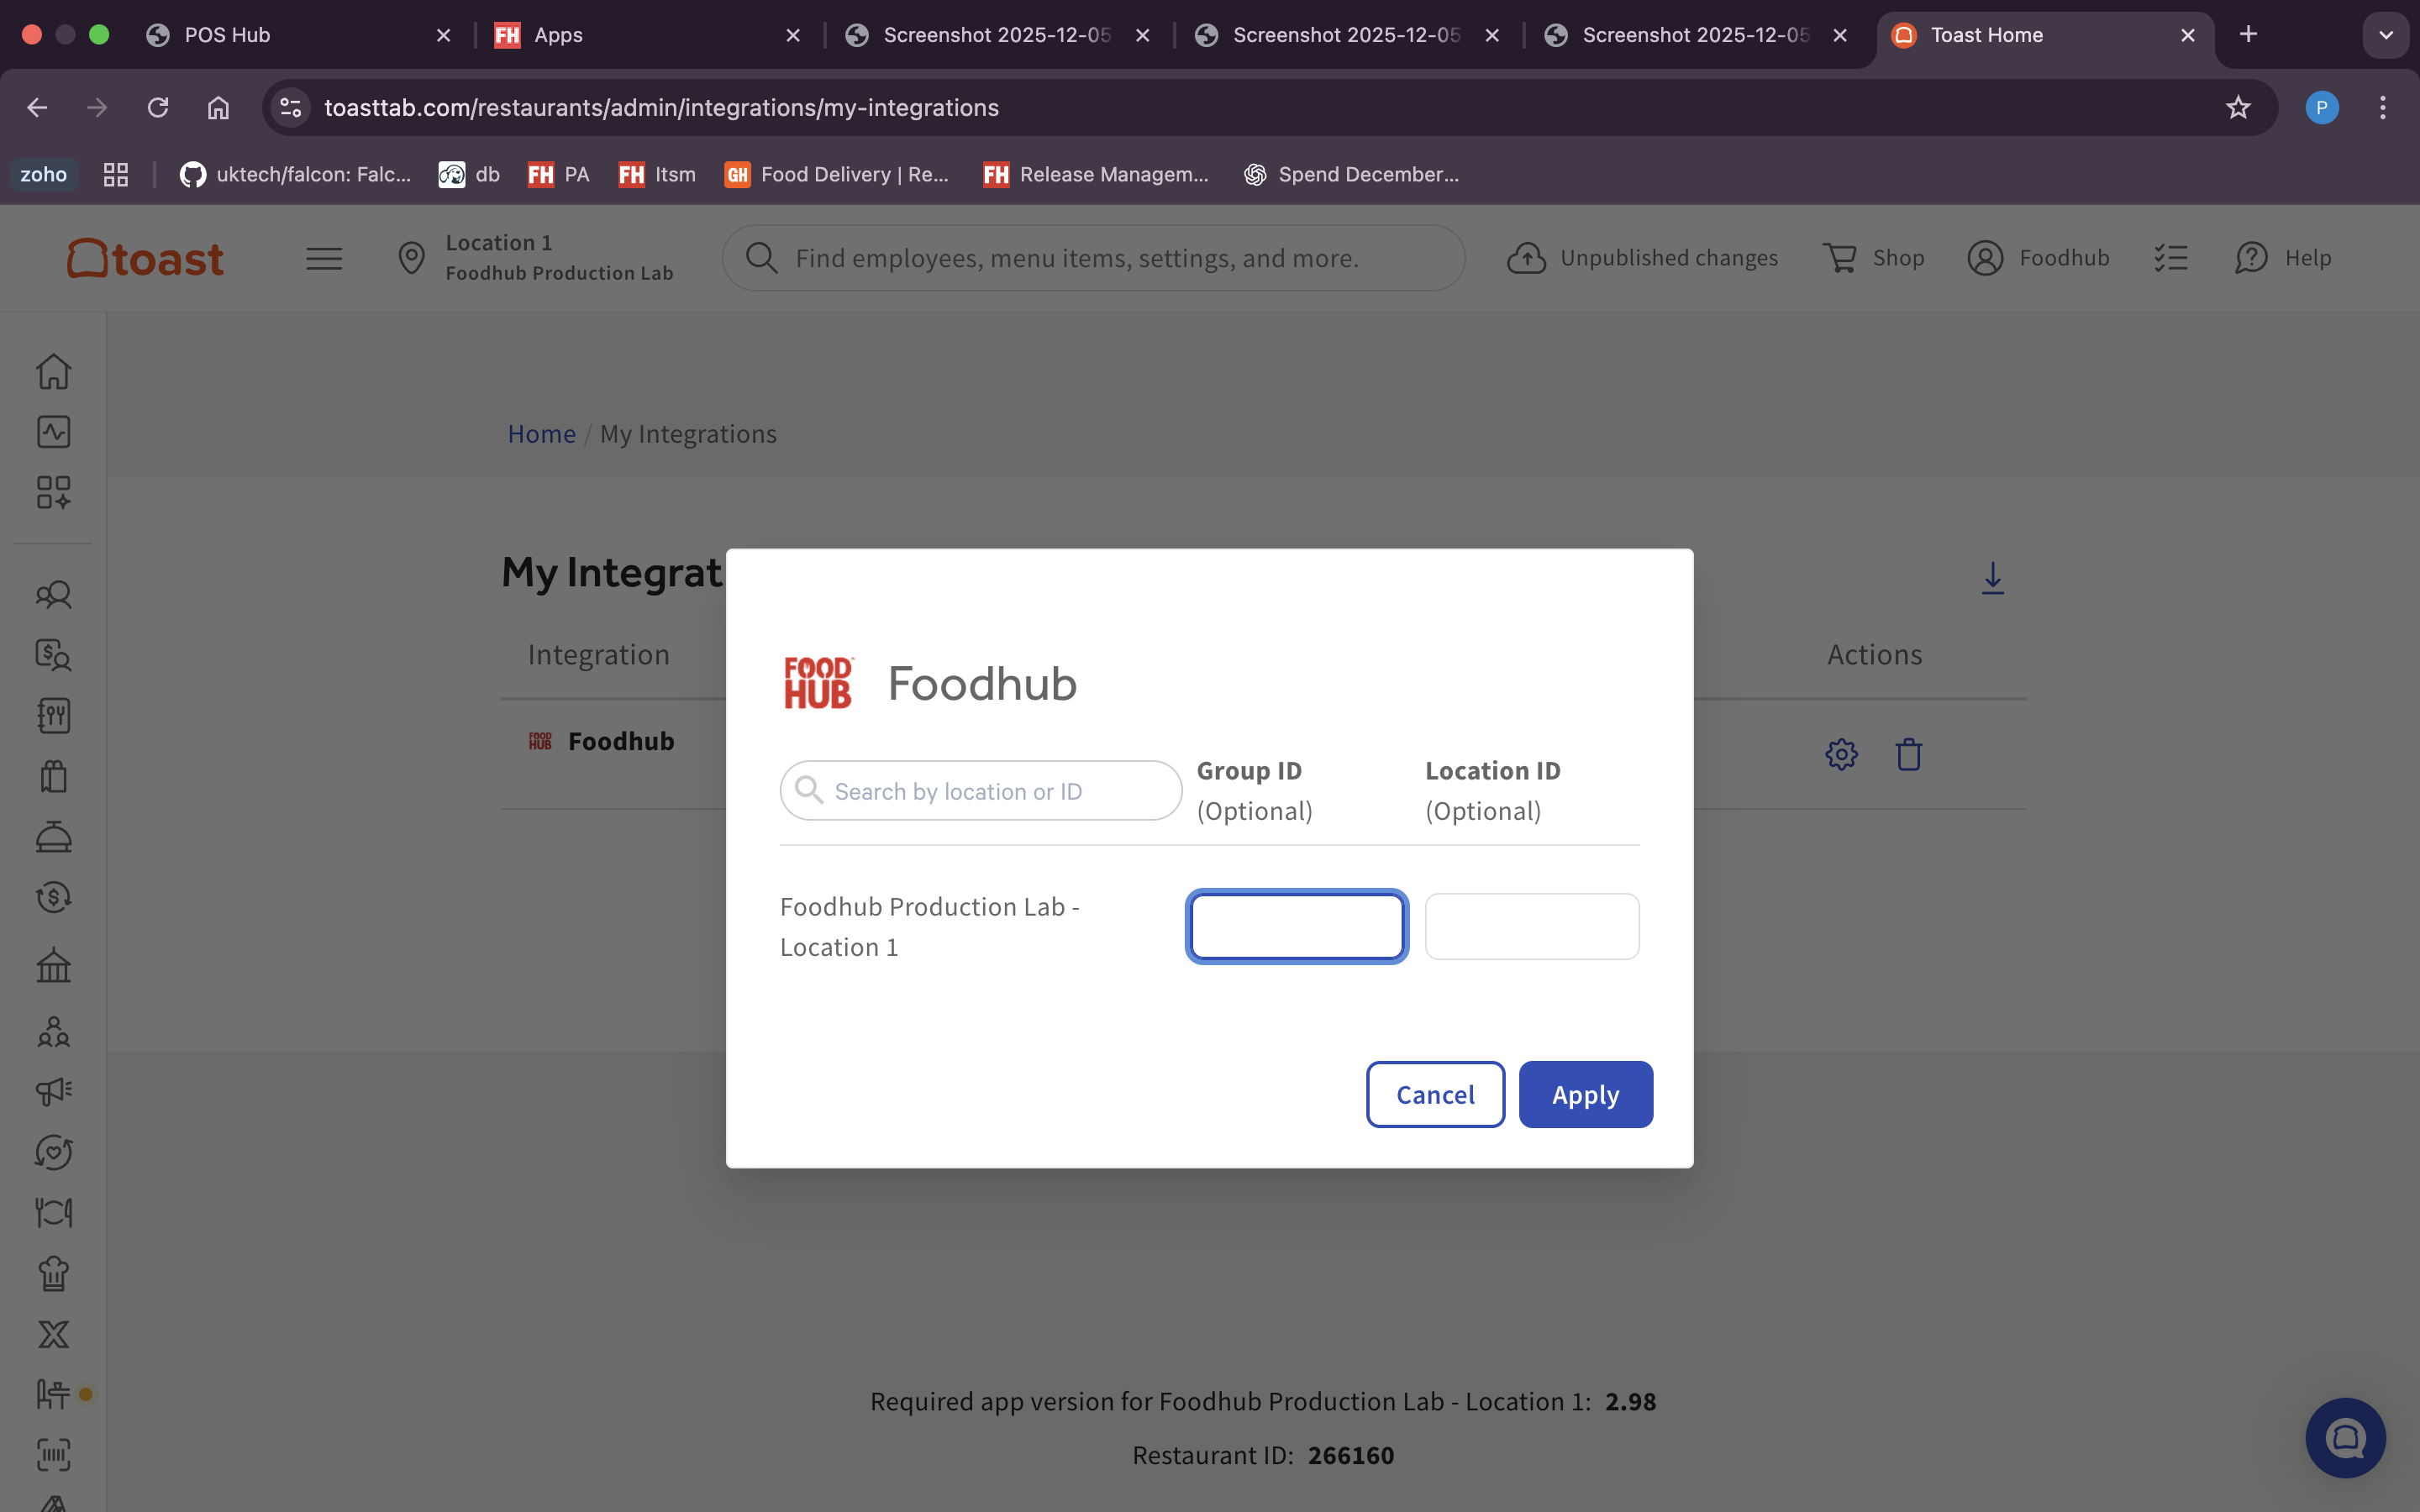
- Open the Toast Add Integrations page and search for FoodHub. Click the Add button on the FoodHub integration tile. If the Add button is not visible, check that the Toast Restaurant Management Suite add-on is enabled for this restaurant (≈ $49 / month). If the FoodHub integration has already been added on this restaurant, skip this sub-step and continue with the next one.
- Navigate to Integrations > Toast Partner Connect
- Enter the Group ID and Location ID copied from POS Hub
- Save and enable the integration
After enabling the integration in Toast, it may take up to 5 minutes for the connection to be verified by POS Hub
4
Configure Integration Settings
5-10 minSet up menu sync, payment mapping, dining options, service charges, discounts and sync toggles. The POS Hub Toast app page exposes inline 'Learn how to set up X in Toast →' links for every section that needs configuration in Toast.
- Open the Toast app page in POS Hub for the location you installed Toast on (Locations → your location → Apps → Point of Sale → Toast).
- Why mapping is mandatory: when an order is injected into Toast, POS Hub must reference Toast's own internal identifiers (GUIDs) for the revenue center, dining option, payment type, and service charge that the order should use. Toast rejects any order that does not include valid IDs for those fields. If even one of the required mappings below is missing, order injection into Toast will fail, so you must complete every required mapping before going live.
- If the dropdowns below are empty / you don't know how to create these in Toast: the POS Hub Toast app page itself has a built-in Learn how to set up [X] in Toast → link next to every section. Click the link, follow Toast's official instructions to create the entity in your Toast back-office, then come back to this configuration page and the new entry will appear in the dropdown after a refresh. The links provided on the page are:
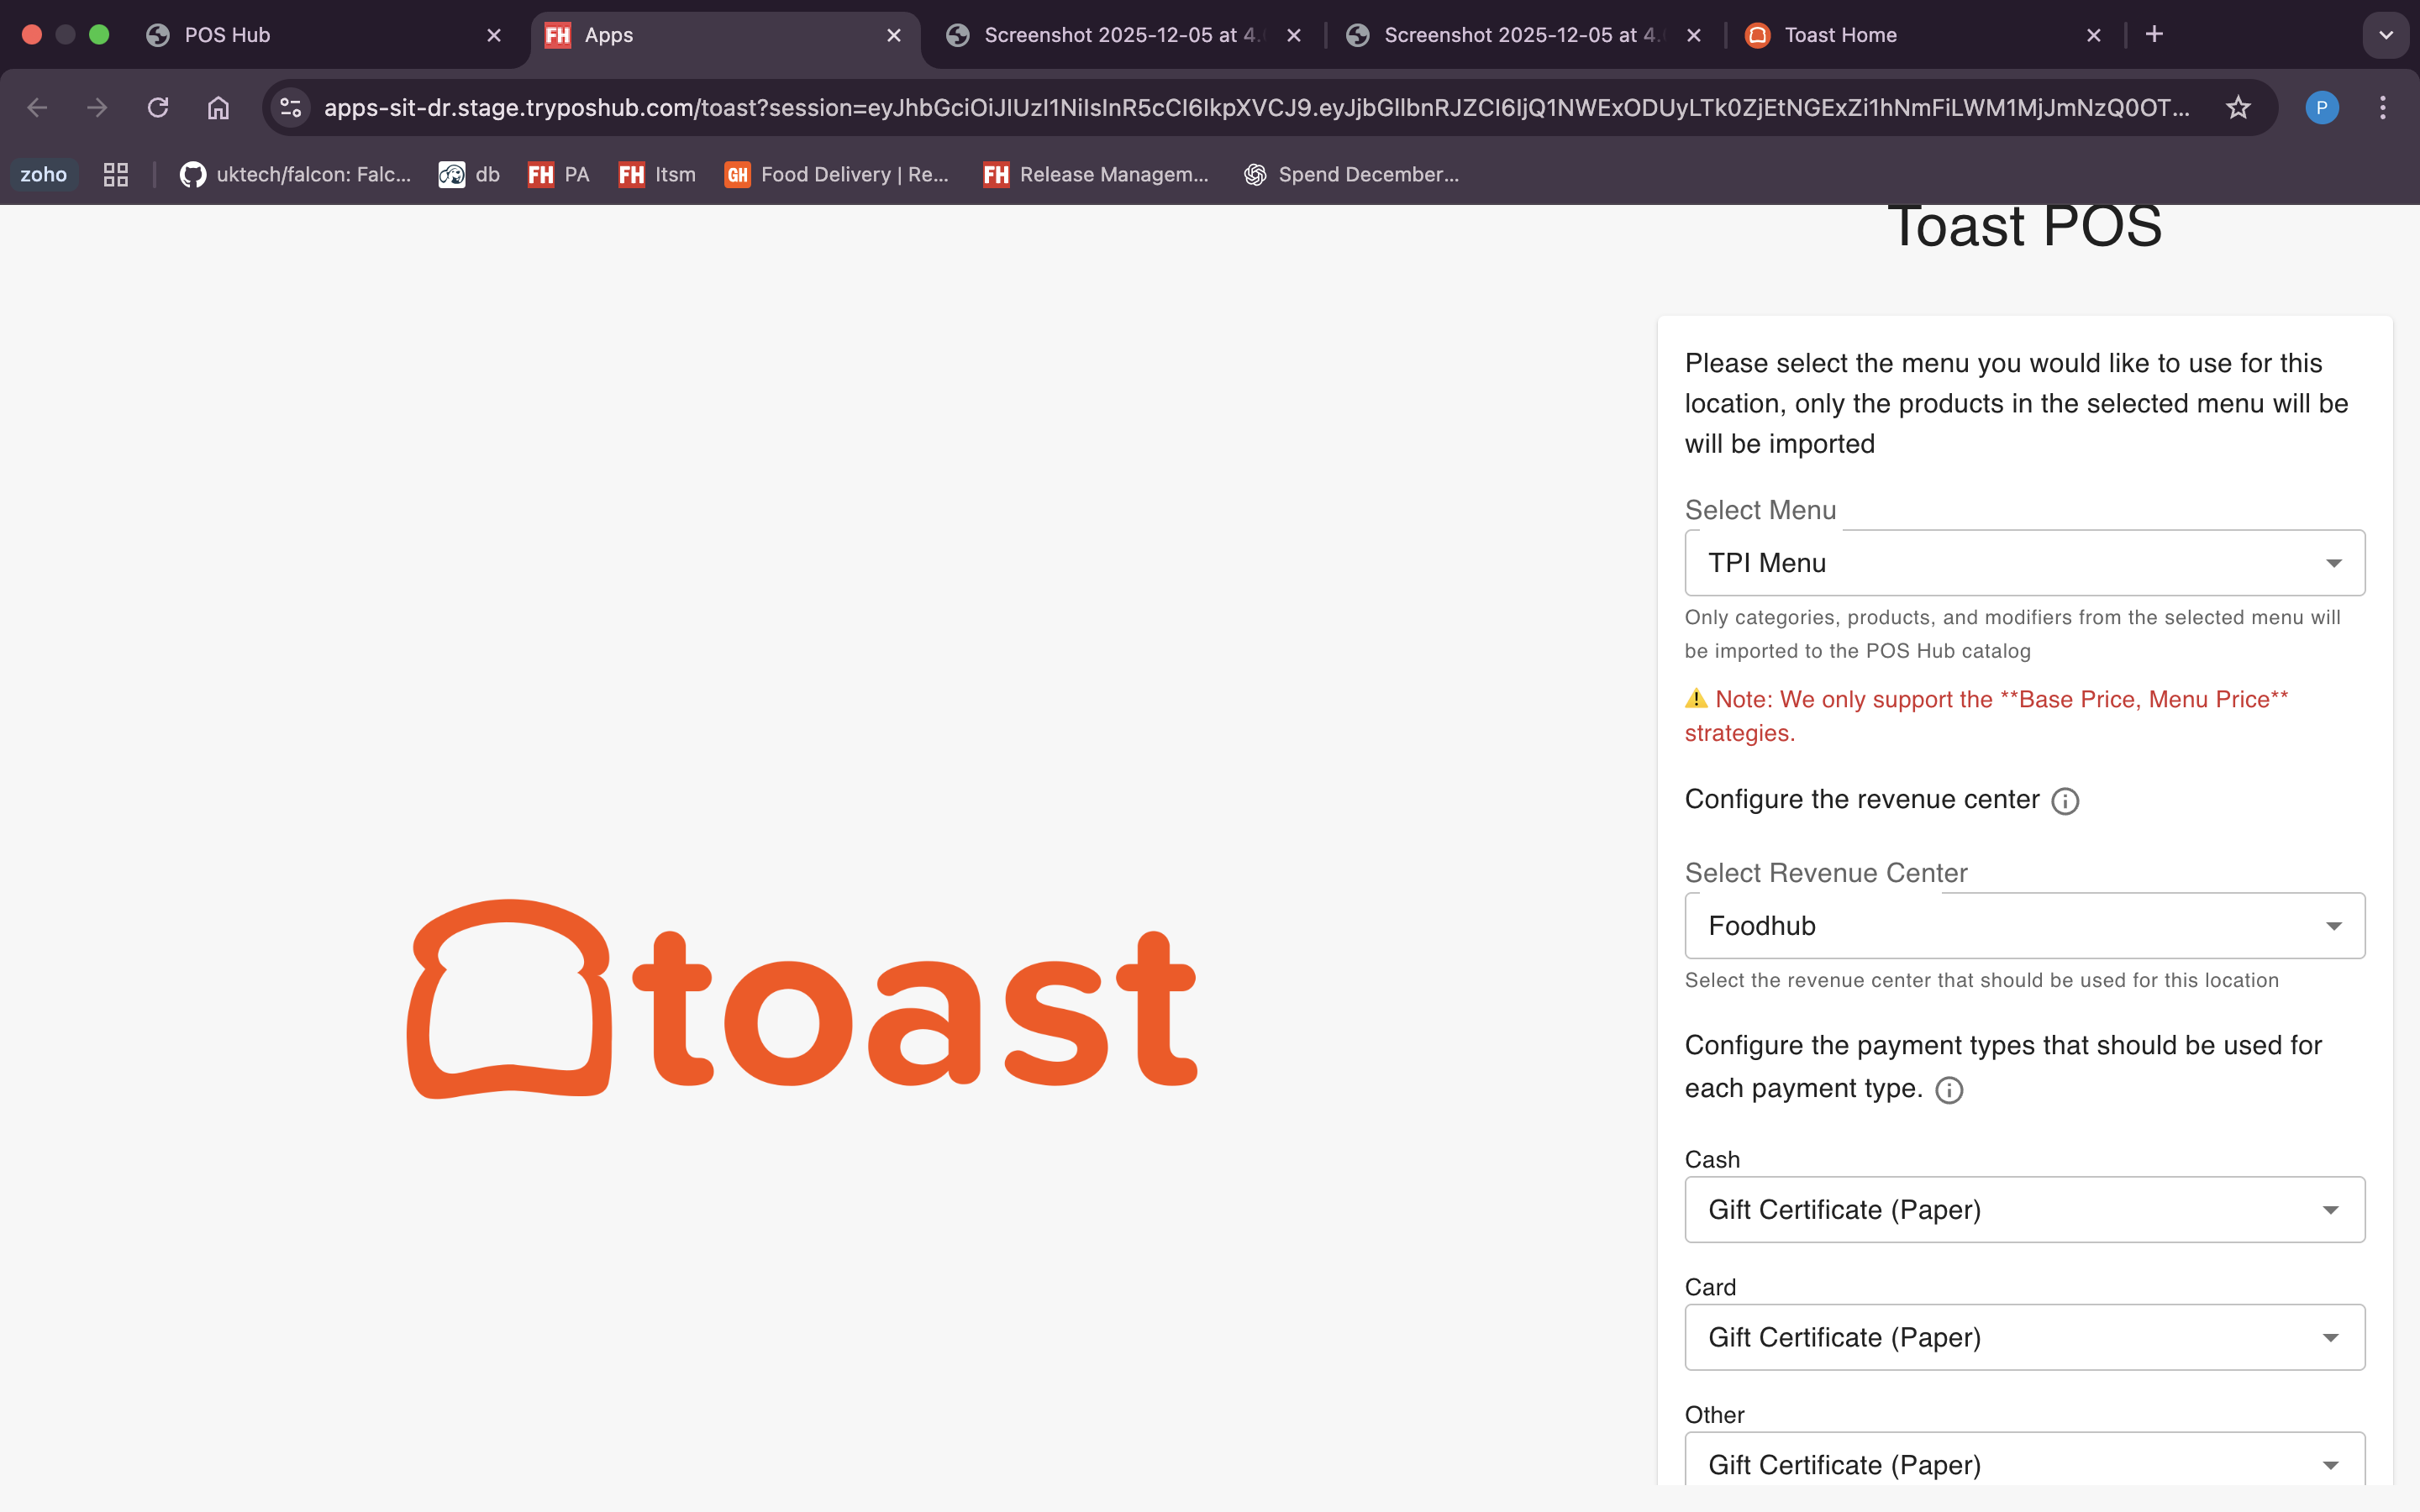
- Select Menu(s) — choose one or more Toast menus to use at this location. Only categories, products and modifiers that exist in the selected menus will be imported into the POS Hub catalog. Important: only the Toast pricing strategies Base Price and Menu Price are supported; items priced via other strategies (Size Price, Time-Specific, etc.) will not sync correctly.
- Select Revenue Center (required for order injection) — pick the Toast revenue center that incoming orders from POS Hub should be assigned to. This drives reporting in Toast and is sent on every injected order.
- Map payment types — Cash / Card / Other (required for order injection) — POS Hub forwards orders tagged with one of three payment buckets (Cash, Card, Other). Pick the matching Toast Other Payment type for each so Toast knows how the payment was tendered. If a dropdown is empty, create the matching payment types in Toast first under Payments → Other payment options, then return here.
- (Optional) Configure payment types by provider — toggle this ON if you want different Toast payment types per marketplace (e.g. Uber Eats card vs Deliveroo card vs Just Eat card). When enabled, an extra section appears where you map Cash and Card for every connected provider. Leave OFF to use the global Cash/Card/Other mapping above for all providers.
- Map dining options — Delivery / Collection / Dine In (required for order injection) — for each fulfilment type, pick the matching Toast dining option. Only Toast dining options with the correct behaviour are listed: DELIVERY for Delivery, TAKE_OUT for Collection, and DINE_IN for Dine In. Create the missing dining option in Toast if a dropdown is empty.
- Map service charges — Delivery / Service / Other (required if your orders carry charges) — pick the Toast service charge to apply for each. Only Toast service charges with amount type = OPEN are listed (so POS Hub can pass through the actual charged amount). If your existing service charges are FIXED or PERCENT, create an OPEN-amount service charge in Toast and use that here.
- Map discount — pick the Toast discount that POS Hub will use to push order-level promotions/discounts. Only Order-level discounts with type OPEN_FIXED are supported. Item-level and percentage discounts will not be applied.
- Toggle: Sync online ordering hours — when ON, POS Hub will keep Toast's online ordering hours in sync with the location's opening hours configured in POS Hub. Turn OFF if your store hours are managed only in Toast.
- Toggle: Use collection hours for delivery — when ON, the collection (pickup) opening hours are also applied to delivery, instead of having a separate delivery schedule. Turn OFF if your delivery hours differ from collection hours.
- Toggle: Use subcategories instead of categories when they exist — when ON, if a Toast menu group has child groups (subgroups), those subgroups are imported as POS Hub categories instead of the parent group. This gives a finer category breakdown in POS Hub. Leave OFF to import top-level Toast menu groups as categories.
- Toggle: Send customer name in tab — when ON, POS Hub writes a descriptive label into the Toast tab/check name so the kitchen ticket clearly identifies the order at a glance. The label is composed (in this order) from: (a) Table name if the order has a table assigned, otherwise the customer's first and last name; (b) the order source (e.g.
uber eats,deliveroo,just eat) plus the channel order ID (friendly id, falling back to the partner id); and (c) the customer's Phone PIN if available. The combined string is truncated at 255 characters. Leave OFF to keep generic Toast tab naming. - Toggle: Receive Orders from Toast — when ON, orders created directly in Toast (in-store, phone, kiosk, etc.) are pushed back into POS Hub. Leave OFF if POS Hub should only see orders that originated from POS Hub-connected channels.
- Toggle: Prices Override (visible only after a menu is selected) — when ON, POS Hub uses the prices from your POS Hub menu instead of the Toast item prices when building Toast orders. After turning this ON you must use the Prices Override Item Mapping picker that appears below to choose the Toast catalog items POS Hub should use to represent the override line(s). Leave OFF to keep Toast's prices authoritative.
- Click Save. POS Hub validates the mappings and surfaces any missing required field. Once saved, the integration is fully configured and the catalog will start syncing.
Mappings to Toast IDs (Revenue Center, Dining Options, Payment Types, Service Charges) are MANDATORY — orders cannot be injected into Toast unless these are filled in. Save when finished; nothing is applied to live orders until you click Save.
5
Sync Catalog
3-5 minSynchronize your Toast menu catalog to POS Hub
- After selecting a menu in the Toast app configuration, the catalog will sync automatically to POS Hub
- Alternatively, you can manually trigger a sync by clicking the 'Sync Catalog' button on the Toast app
- Wait for the synchronization to complete
- Navigate to the Catalog tab in POS Hub to verify all items appear correctly
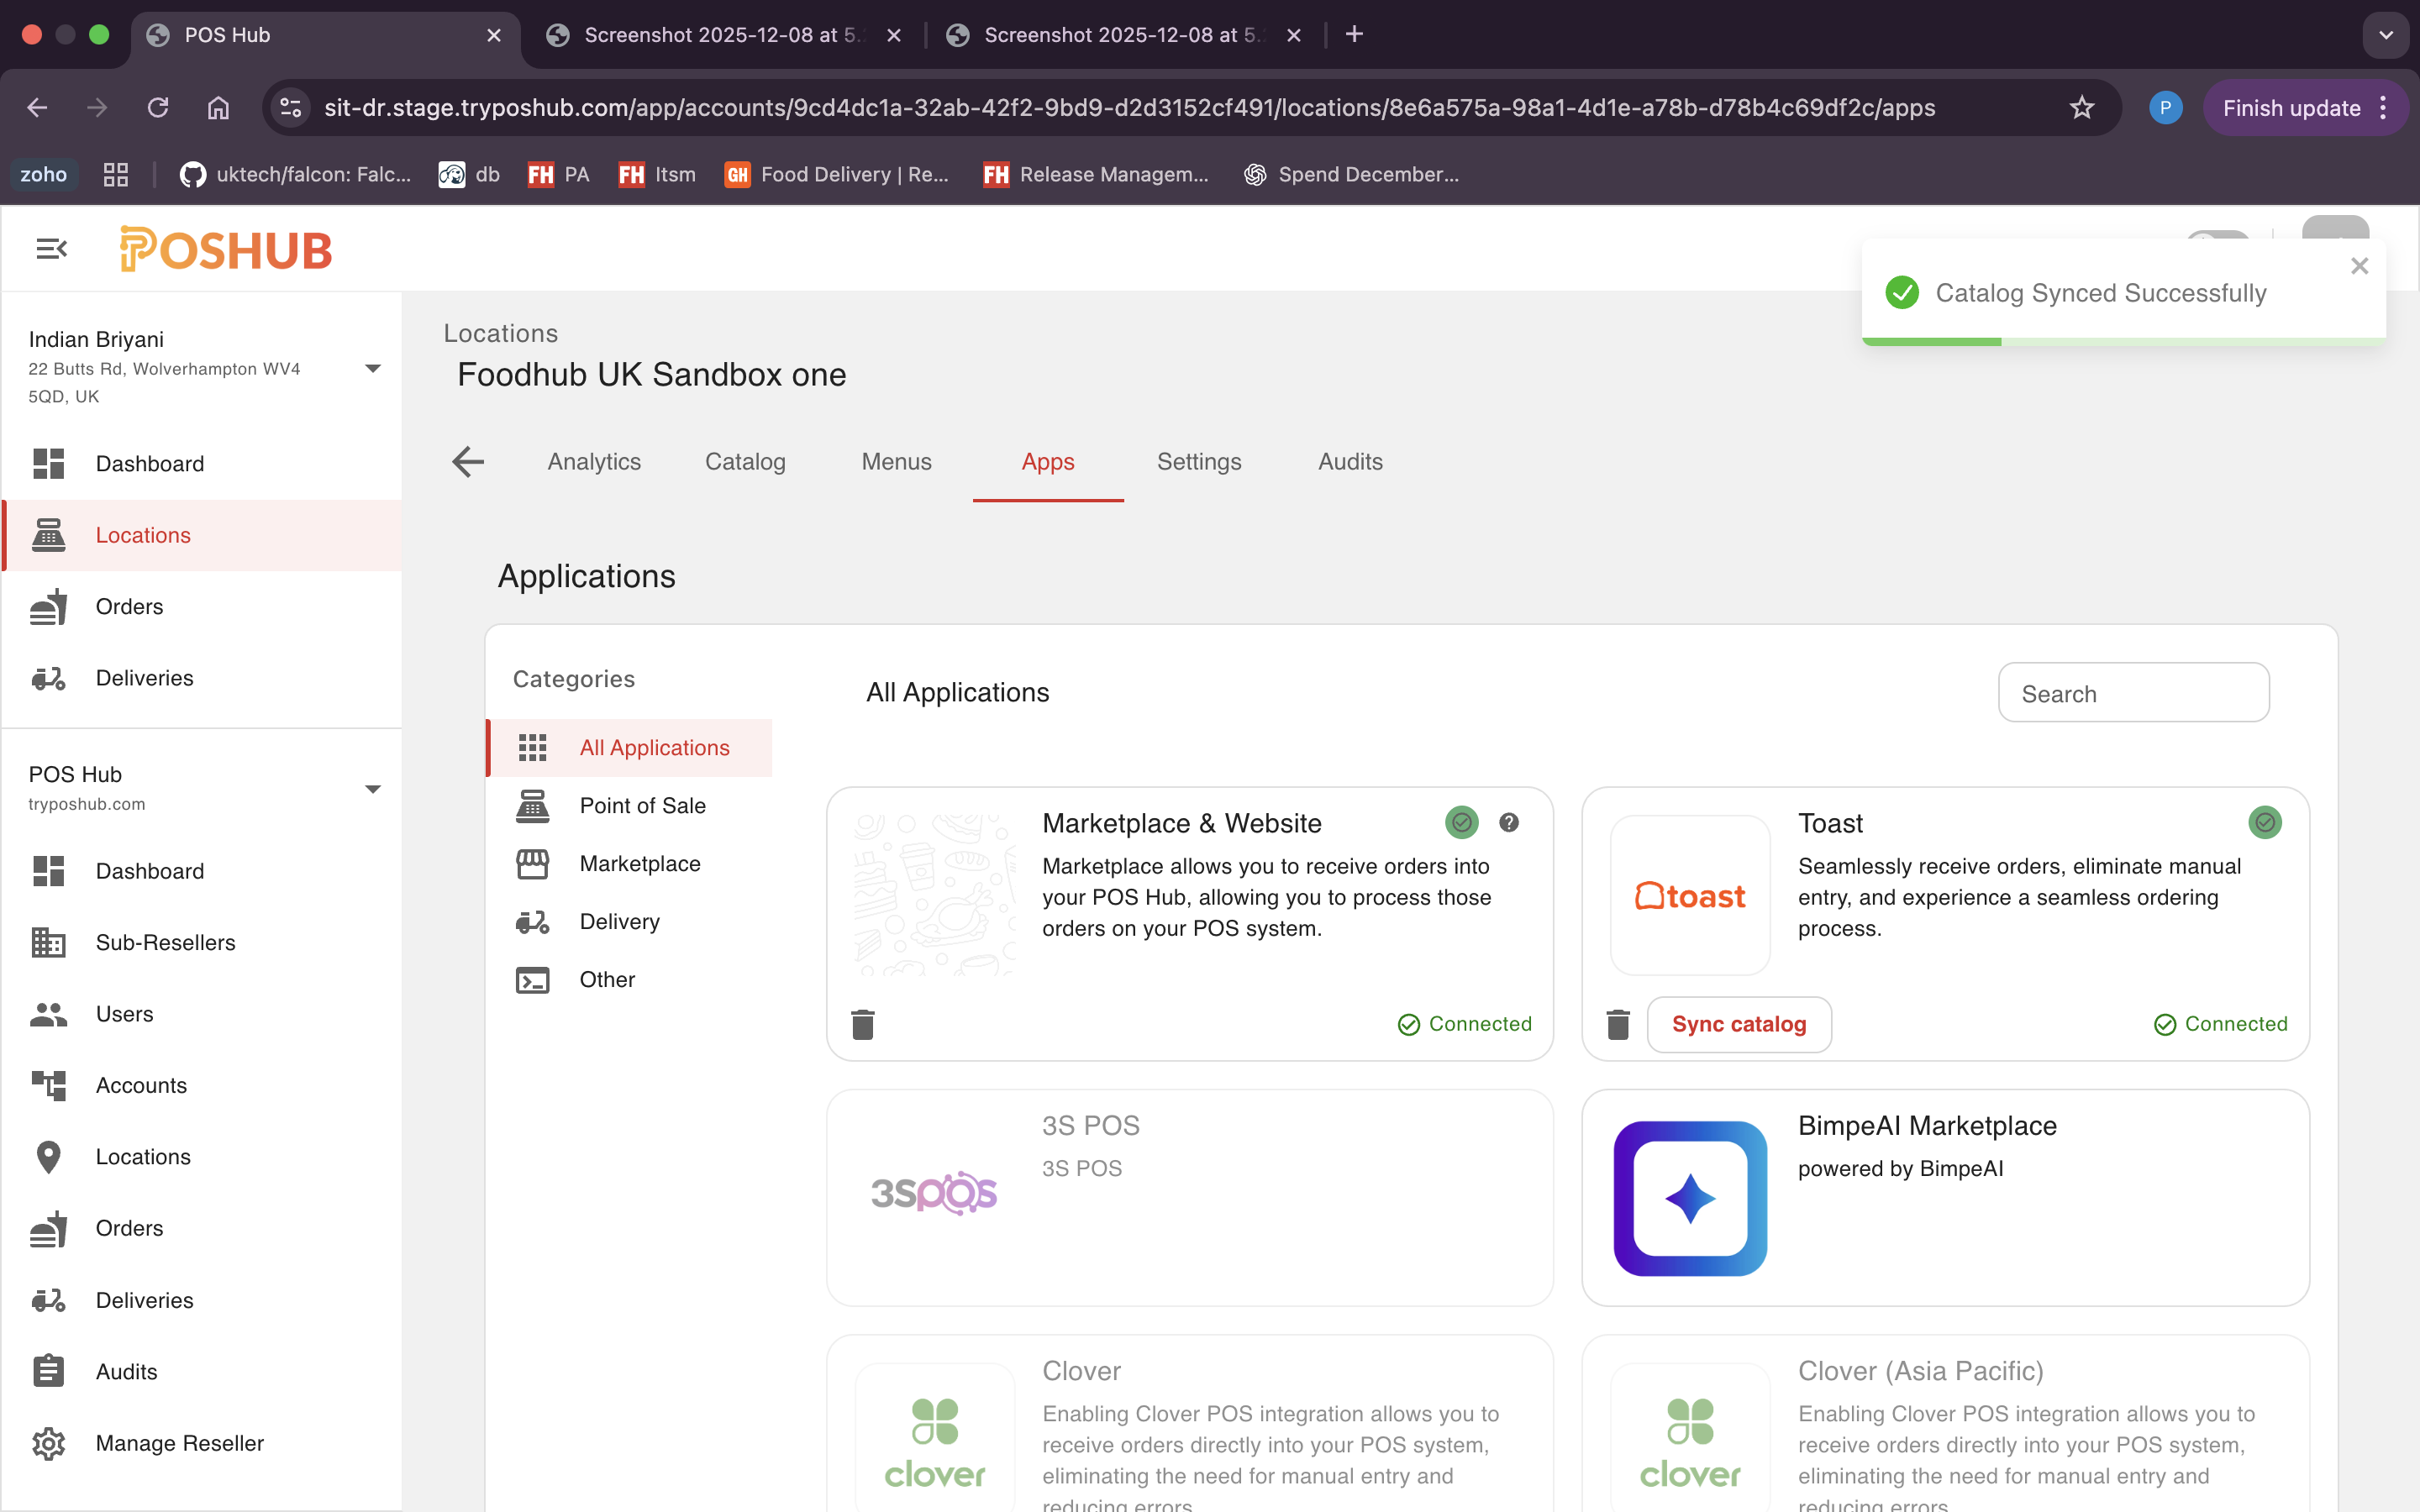
The catalog sync includes products, categories, modifiers, and modifier groups from your Toast menu
6
Publish Menu to Marketplaces
5-10 minCreate and publish your menu to connected marketplaces
- Navigate to the Menu tab in POS Hub
- Create a new menu or edit an existing menu using items from your catalog
- Click the Publish button to publish your menu to all marketplaces connected to your POS Hub location
- Verify your menu items appear correctly in each connected marketplace
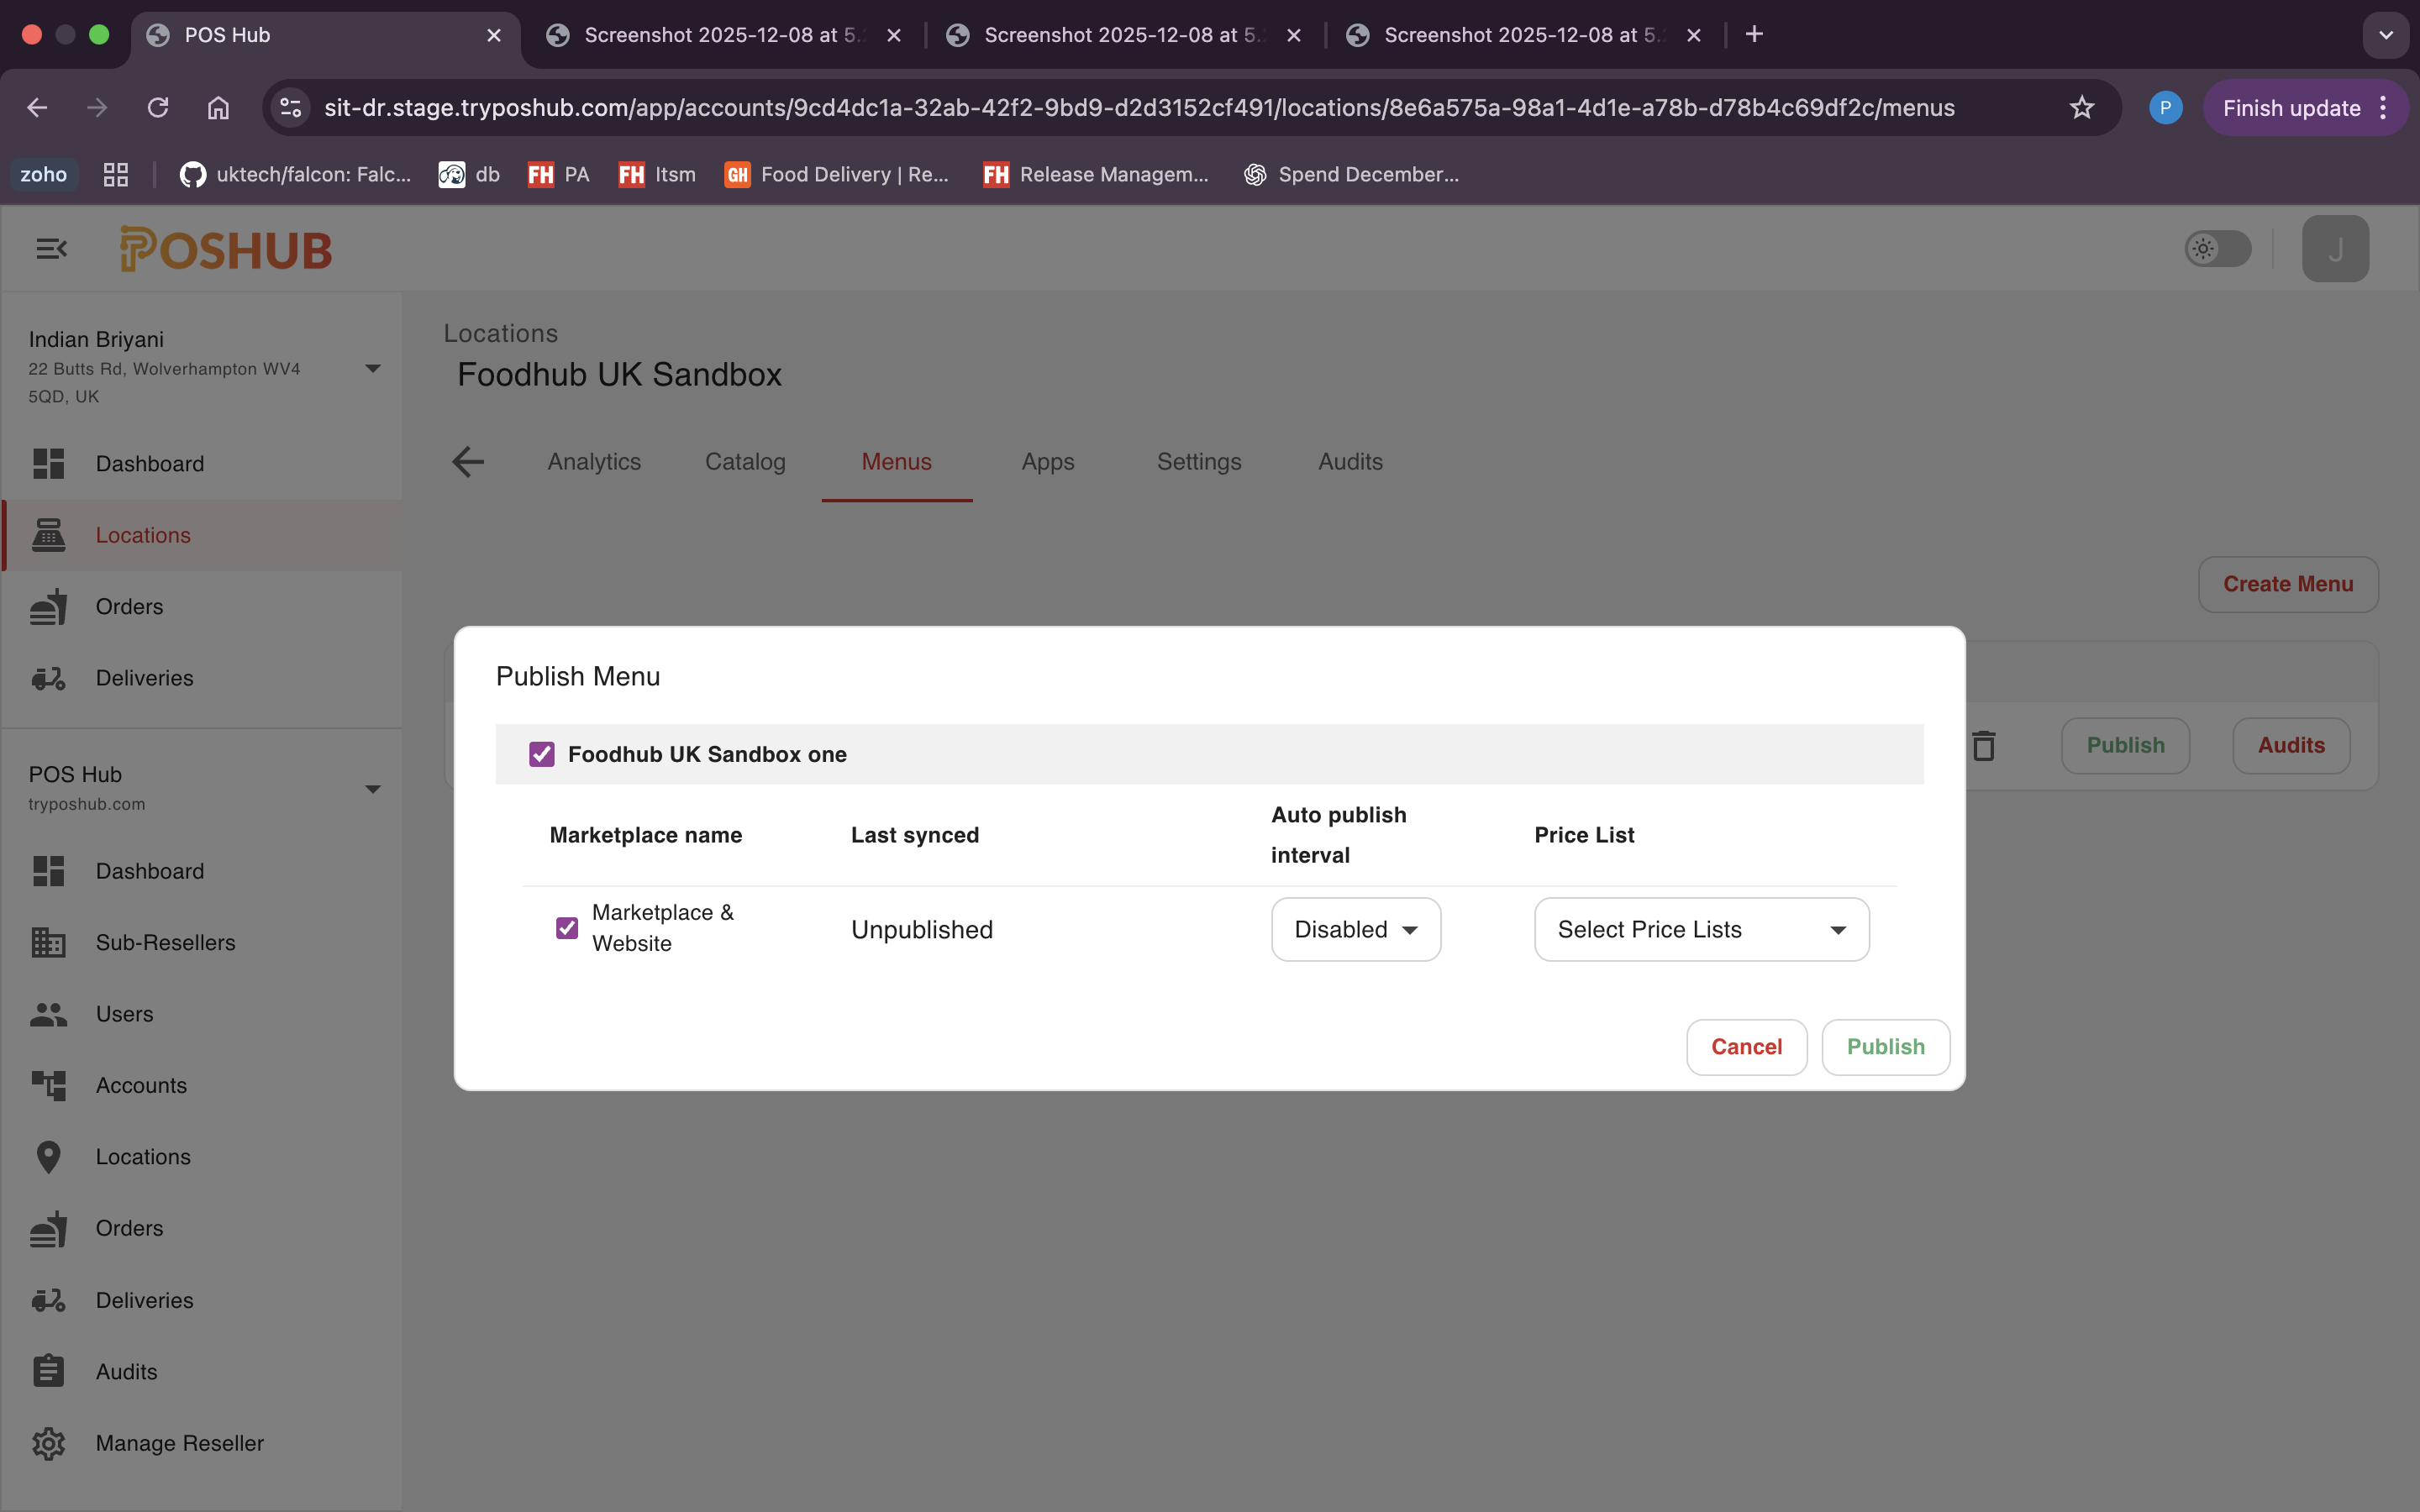
Your Toast POS is now fully connected. Orders from marketplaces will be sent directly to your Toast system
Configuration Options
After completing the onboarding process, you can configure:
- Menu Selection: Choose which Toast menu to sync with POS Hub
- Revenue Center: Select the appropriate revenue center for incoming orders
- Payment Mapping: Map POS Hub payment types to Toast payment types
- Dining Options: Map fulfillment types to Toast dining options
- Service Charges & Discounts: Configure how these are handled in orders
- Sync Settings: Enable online ordering hours sync and subcategory usage